How to Root Galaxy S3 T Mobile SGH T999 on Android 4 3 Jelly Bean Firmware


The T-Mobile version of the Samsung Galaxy S3 with model number SGH-T999 has already received the Android 4.3 Jelly Bean update with firmware build number T999UVUEMJC.

Samsung Galaxy S3 (T-Mobile) SGH-T999 users who have already installed their devices with Android 4.3 Jelly Bean, may root their devices using the tutorial below.

This tutorial uses CF-Auto-Root file released by Elite Recognized XDA-Developers, Chainfire. The CF-Auto-Root file allowing Galaxy S3 users to root their devices easily without depending on the firmware. It completely supports Android 4.3 Jelly Bean and future firmware as well. Head over to the CF-Auto-Root main thread to learn more about the root method.

Disclaimer: Rooting voids the warranty of your device. We and the developer of this rooting procedures shall not be held responsible if any undesirable outcomes may happen to your device. use of this root guide is solely at your own risk!

Pre-requisites
1. Install USB Driver for Samsung Galaxy S3 on the computer.
2. Enable USB Debugging Mode on the phone by navigating to Settings >> Developer Options.
3. Make a backup of all your important data before following the guide.
4. Ensure the battery of the phone is charged more than 80 percent.
5. The CF-Auto-Root file works only on the Galaxy S3 (T-Mobile) SGH-T999. Applying this to any incorrect variant might brick the device. Verify the model number of the Galaxy S3 by navigating to Settings >> About Phone.

File Required
1. CF-Auto-Root for Galaxy S3 (T-Mobile) SGH-T999 (CF-Auto-Root-d2tmo-d2tmo-sght999.zip)
2. Odin 3.07

Steps to Root Galaxy S3 (T-Mobile) SGH-T999 Running on Android 4.3 Jelly Bean Firmware
Step 1: Extract CF-Auto-Root and Odin 3.07 files using winrar/7zip/winzip or any other extracting tool.
Step 2: Switch off the Galaxy S3. Then boot the device into Download Mode by pressing and holding Volume Down, Home and Power buttons together until a construction Android robot icon with a warning triangle appears on screen. Now press the Volume Up button to enter Download Mode.
Step 3: Launch Odin on the computer as an Administrator.
Step 4: Connect the Galaxy S3 to the computer using USB cable while it is in the Download Mode. Wait until Odin detects the device. When the device is connected successfully, the ID: COM box will turn to light blue with the COM port number. Additionally, the successful connected will be indicated by a message saying Added.

Note: If the Added message does not appear, then try re-install USB drivers or changing the port on the computer.

Step 5: In Odin, click the PDA button and select the CF-Auto-Root-d2tmo-d2tmo-sght999.tar.md5 file.
Step 6: Verify that Auto Reboot and F. Reset Time checkboxes are selected in Odin. Also, ensure the Re-Partition option is NOT selected.
Step 7: Double-check and click Start button in Odin. The installation process will now begin.
Step 8: Once the installation process is completed, your phone will restart and soon you will see a PASS message with green background in the left-most box at the very top of the Odin. You can now unplug the USB cable to disconnect your device from the computer.

Samsung Galaxy S3 (T-Mobile) SGH-T999 running on Android 4.3 Jelly Bean firmware is now rooted successfully. You can now install any app that requires root permission. Verify the root status of the device by downloading Root Checker app from Google Play Store.

Thanks to all fellas at XDA who first tried out this rooting technique. This method was originally posted via XDA-Developers original thread.
Read More..

Kingo Android Root 1 2 4 2090 Download Apk Android

Free Kingo Android Root 1.2.4.2090 Full Apps Download

The root of your device free download for Android users download Android Kingo root easy and safe way. APK file to your mobile for free app, Android OS, Android Kingo root free download. Almost all of the Android version of the model and supports. 
Free Kingo Android Root Full Apps Download

This function includes a built-in root to remove either your Android device with one click. Windows XP (SP2 or later), Windows Vista, Windows 7, Windows 8 operating system support.
Author: KingoApp Technology Ltd.
Date: 09/24/2014
Size: 17.3 MB
Requires: Android
Free Download
Read More..

HD Widgets 2 0 4 Apk For Android OS


HD Widgets 2.0.4 Apk | 4.1 MB | Mediafire Download
Requires Android:2.1 and up


The best HD Widgets on Android! Now available for phones & Honeycomb tablets. HD Widgets does two things: gives you great looking widget and makes it fun and easy to customize them.

v2.0.4 update:
- Minor bug fixes
- Updates for Italian, Swedish, French, Spanish & Danish

The app includes a dozen colorful, widgets including special tablet-sized widgets for 7″ & 10″ Honeycomb tablets. Most display time and weather while the larger ones include your choice of 5-day forecast or utility switches.

The best part of HD Widgets is how fun and easy it is to use. Everything in the app is swipe-able: the menu, the pages, and the options. You just swipe left and right to change details on the fly. You can mix and match 30 different clocks (LED, flip clock, and Honeycomb) with backgrounds, layouts, and options. Simple!

App Features
- fullscreen tablet app
- fun & unique “slidey-nav” UI
- quick and easy editing
- visual configuration
- page swiping, menu swiping, option swiping
- Fullscreen weather activity
- HD weather icons
- quick tips to help you get started

Widget Features
- lots of beautiful widgets
- clock, date, location, weather, forecast, & utility switches
- LED, Flip Clock, & Honeycomb clock designs
- over a dozen backgrounds
- large made-for-tablet widgets
- 100s of configurations
- hot spots for alarm clock, calendar, & weather

Options
- choice of AccuWeather or WeatherBug service
- 12 / 24 hr clock
- F / C temperature
HD Widgets 1HD Widgets 2HD Widgets 3

Download
 
 http://www.4shared.com/android/wt6GHJNM/hd_widgets204.html
 
 or
 
 https://rapidshare.com/files/498376401/hd_widgets.2.0.4.apk
 
 or
 
 http://www.mediafire.com/?t2wqagrsl5jncad
 

Download - Market
Read More..

Naval Clash 1 4 1 Apk For Android OS


Naval Clash 1.4.1 Apk | 4.3 MB | Mediafire Download
Requires Android:2.0 and up
 The classic battleship of the day when computers were still huge.
Play classic battleship game from your childhood. Setup your ships on the field, then shoot enemys ones.

The objective of this guess and shoot game is to find and sink all enemy ships. You should do it faster than your opponent.

Whats in this version:
- UPDATE if you have problems with 1.4.0. There was a problem with android 2.1. Sorry.
- UPDATE to this version! Previous versions will play online only till 15-Nov-2011!
- New advanced score calculation algorithm. Hit small ships first, save your fleet, miss less and you are in top ten.
- Changes in WebMan to prevent quitters leave the game before defeat
- Webman speed-up
- Small bug fixes
- Many improvements in the code

Features:
- Nice hand drawn graphics
- Single player fights with your Android
- Multiplayer clashes via bluetooth
- Worldwide battles on the Web
- High scores
- Global high scores
- Supports Honeycomb tablets
- Free, no Ads.
- App2SD

Take a look to Naval Clash Admiral Edition with many additional features.
Follow us on Twitter @NavalClash, we are glad to hear your opinion and suggestions.
If you have any problem with the game do not set a low rating, just send us e-mail and we will fix it. E-mail to navalclash@gmail.com


Download
 
 http://www.mediafire.com/?aag0a5q28bgs1yd
 
Read More..

Tower Command HD v1 4 Full Apk Version

Tower Command HD v1.4 Full Apk Version. Tower Command HD New stunning visual design Tower Command HD- Defense has been re-imagined. Got a great idea for a Map/Level for this game (which you would like to play), please let us know. We might surprise you! Please do mail us for reporting any bug/ feature request or any issues, we will try and fix those in our updates. Keywords: tactical game , tower defense , action game, mobile strategy, strategy game, tower command, command, tower, defense, tower defense, defend, action, HD, HD games.


Download Tower Command HD v1.4 Full Apk Version
Mirror
Download Tower Command HD v1.4 Full Apk Version
Read More..

Scanner Radio Pro 3 4 Apk For Android OS


Scanner Radio Pro 3.4 Apk | 1.2 MB | Mediafire Download
Requires Android:1.6 and up

Listen to police and fire departments from around the world on your phone.
Listen to live audio from over 2,900 police and fire scanners, weather radios, and amateur radio repeaters from around the world (with more being added daily).

V3.4 update:
- Added the ability to change the color of the LCD window on directory and player screens and on the widgets to a color other than orange.
- Added the ability to add directory folders (such as a directory entry for a county or a state) to your Favorites.
- Added workaround for Cellular South/C Spire’s connection blocking.
- Plus miscellaneous other minor enhancements, bug fixes, etc.
- Complete list of changes at http://www.facebook.com/scannerradio

Features:
* Add scanners you listen to the most to your Favorites list for quick access.
* View scanners that are located nearest you, sorted by distance, by clicking on “Near Me”
* View the top 50 scanners that have the most listeners (updated every 5 minutes).
* View list of scanners added most recently (new additions are being added all the time).
* Browse the directory of scanner feeds by location or by genre (public safety, weather, railroad, etc).
* Configure alerts to have the app notify you when lots of people are listening to a scanner (indicating that something big may be happening).
* Add Scanner Radio widgets and/or shortcuts to your phone’s home screen for quick access.
* Add a “Scanner Radio Favorite” shortcut to your home screen to launch a scanner feed via an alarm clock app or automation app.

In addition to the above features, you also get the following features with this version of the app:

* The ads are removed.
* Allows you to specify what times of day you want to receive listener alerts.
* Allows you to setup listener alerts for scanners located near you.
* The play button at the top of the directory screens and on the widgets is functional.
* Allows you to listen to archived audio (from the past 30 days) if you have a RadioReference.com Premium Subscription. Their premium subscription is $15 for 6 months, without it you will not be able to access their audio archives using the app.

The audio is provided by volunteers using real scanner radios. If your area is not available, see the menu in the app for information on how to get it added.

Install the Scanner Radio Chat Plug-In (it’s free) to get access to the Scanner Radio chat rooms (see the plug-in’s description for more information).

The “Phone Calls / Read Phone State” permission is needed by the app so that it can detect when you’re placing a phone call (or when one is being received) so that it can automatically stop the streaming of the audio to prevent it from interfering with the call.

The “Fine (GPS) Location” and “Coarse Location” permissions are required so that the app can determine what scanners are located in your area when you click on “Near Me”. When you click on “Near Me” the app first attempts to determine your location via the network, if that fails the app then tries to determine your location via GPS.

The “Automatically Start at Boot” permission is required so that a small portion of the app can be started when your phone boots if (and only if) you turn on the listener alert checking feature of the app (that feature is turned off by default).

If the audio repeats or the app stays connected for only a short time, try returning to a directory screen in the app, then select “Settings” from the menu, then “Player settings”, and then try changing the “Streaming method” setting.

Note that the widgets are not available if the app has been installed on an SD card. If you can’t find the widgets, move the app off of your SD card.

Follow “Scanner Radio” on Facebook or ScannerRadio on Twitter to be notified about service interruptions, new beta versions, etc.

Download
 
 http://www.mediafire.com/?d6xnyr94b96ekc3
 

Download - Market
Read More..

ViewSonic ViewPad E100 Android 4 0 Tablet dengan layar 9 7 inci SuperClear

ViewSonic menambahkan Produk ViewPad E100 barunya, produk ini menjalankan sistem operasi Android 4.0 Ice Cream Sandwich. Tablet ini didukung oleh prosesor 1GHz dengan 1GB RAM. Tampil dengan layar lebih besar touchscreen  9,7 inci SuperClear IPS dengan resolusi 1024 × 768 , kecerahan 420cd/m2 dan rasio kontras 800:1, dan kamera depan 1,3 Megapixel tetapi tidak memiliki kamera belakang.
ViewSonic ViewPad E100

ViewSonic E100 dilengkapi dengan penyimpanan internal 4GB dan mendukung microSD / SDHC hingga 32GB.  Perangkat ini juga memiliki fitur Wi-Fi (802.11 b / g / n),  Bluetooth serta Speaker dan Microphone untuk tujuan multimedia Anda. ViewSonic ViewPad E100 juga dilengkapi port seperti jack audio 3.5mm, port mini HDMI untuk pengguna untuk membawa media HD ke layar lebar dan port USB mikro dengan fitur sinkronisasi data. Tablet ViewSonic ViewPad E100 ini dilengkapi dengan baterai 2700mAh dapat  terus digunakan hingga 5,5 jam. ViewPad berjalan Android 4.0 Ice Cream Sandwich dengan ViewScene 3D UI menawarkan animasi khusus dan efek 3D dan widget kustom.

ViewPad ViewSonic E100 akan dibanderol dengan harga $ 299 atau sekitar Rp. 2.700.000
ViewSonic ViewPad E100 Tampak depan

Spesifikasi ViewSonic ViewPad E100


  • Dimensi :242.1 x 189.1 x 9.1 mm
  • Berat :610 gram
  • Layar : 9.7" IPS capacitive multi-touch screen
  • Memori : DDR3 1 GB, 4GB MMC iNAND
  • Kamera : CMOS 1.3 MP
  • Prosesor : 1 GHz
  • OS : Android™ 4.0 Ice Cream Sandwich
  • Baterai: 2700mAH, 5.5 hrs (approx)
  • Konektivitas: Wi-Fi (802.11 b/g/n), Bluetooth
Press release : Viewsonic
Read More..

How to Update Nexus 5 with Android 4 4 1 KOT49E KitKat

Google Nexus 5 has already received the latest Android 4.4.1 KitKat OTA update with build number KOT49E.

Nexus 5 users who missed the OTA update notification or cannot wait for its official release, may follow our step-by-step guide to install the update manually.

Pre-requisites
1. Install the Android SDK. The package includes the necessary drivers for connecting Nexus 5 to the computer.
2. Make a backup of all your important data before following the guide.
3. Enable USB Debugging Mode on the phone. Go to Settings >> About Phone. Tap on Build Number several times till the message shows "You are now a Developer". Exit from "About Phone" and find the "Developer Options" settings. Enable USB debugging.
4. Ensure the battery of the phone is charged more than 80 percent.
5. The Android 4.4.1 KOT49E KitKat file is compatible only with the Nexus 5 running on Android 4.4 KRT16M KitKat. Applying this to any incorrect variant might brick the device. Verify the device model number by navigating to Settings >> About Phone.

File Required
1. Android 4.4.1 KOT49E KitKat for Nexus 5

File name: 7ed504f678cea49ecf0974e8cd956e2974e3f943.signed-hammerhead-KOT49E-from-KRT16M.7ed504f6.zip
MD5 sum: d465ab3e78e3d99708687cfb1abf1f14
Size: 54 MB

Steps to Update Nexus 5 (Non-Rooted) with Android 4.4.1 KOT49E KitKat
Note: Make sure your Nexus 5 is NOT rooted and has stock recovery.

Step 1: Rename the Android 4.4.1 KOT49E KitKat .zip file to update.zip.
Step 2: Connect the Nexus 5 to the computer using USB cable. Then copy the update.zip file to the SD card of your phone. Make sure the file is in the root folder.
Step 3: Switch off the Nexus 5. Then boot the device into Fastboot mode by pressing and holding Volume Up and Power buttons together.
Step 4: Follow the on-screen navigation instructions. Then press Volume Up button several times to enter Recovery Mode. An exclamation mark should now appear on the screen. Press and hold the Volume Up and Power buttons together to enter Recovery Mode.
Step 5: Select "update from SD card" option and then navigate to the update.zip file that you copied earlier and confirm the installation by pressing the Power button. The installation should now begin.
Step 6: Once the installation process completes, your phone will boot automatically. It may take about 5 minutes to complete.

Nexus 5 should be now updated with the Android 4.4.1 KOT49E KitKat. Head over to Settings >> About Phone to verify the software version running on the device.

Steps to Update Nexus 5 (Rooted) with Android 4.4.1 KOT49E KitKat
Note: Make sure you have ClockworkMod recovery installed on the Nexus 5.

Step 1: Connect the Nexus 5 to the computer using USB cable. Then copy the Android 4.4.1 KOT49E KitKat .zip file to the SD card of your phone. Make sure the file is in the root folder.
Step 2: Switch off the Nexus 5. Then boot the device into Fastboot mode by pressing and holding Volume Up and Power buttons together.
Step 3: Follow the on-screen navigation instructions. Then press Volume Up button several times to enter Recovery Mode.
Step 4: In CWM Recovery, select "flash zip from SD card" and then select "choose zip from sdcard". Then navigate to the Android 4.4.1 KOT49E KitKat .zip file that you copied earlier and confirm the installation by pressing the Power button. The installation should now begin.
Step 5: Once the installation process completes, return to main Recovery Menu and select "reboot system now". The phone will boot now and it may take about 5 minutes to complete.

Nexus 5 should be now updated with the Android 4.4.1 KOT49E KitKat. Head over to Settings >> About Phone to verify the software version running on the device.
Read More..

How to Update Galaxy Note 3 N900 with Android 4 3 XXUCMJ7 Jelly Bean Official Firmware

Samsung recently released a new Android 4.3 Jelly Bean update with firmware build number N900XXUCMJ7 for the Exynos 5 octa-core variant of Galaxy Note 3 (SM-N900). The new official update is currently available as an Over-The-Air (OTA) update as well as through Samsung KIES.

Firmware details
PDA: N900XXUCMJ7
CSC: N900OLBCMJ3
MODEM: N900DXUCMJ3
Version: Android 4.3
Build date: Oct 30, 2013
Regions: Indonesia, Malaysia, Philippines, Singapore, Vietnam, Thailand

Samsung Galaxy Note 3 N900 users who missed the OTA update notification or unable to access the update over Samsung KIES, may follow our step-by-step guide to install the update manually.

Pre-requisites
1. Install USB Drivers for Samsung Galaxy Note 3 on the computer.
2. Enable USB Debugging Mode on the phone by navigating to Settings >> Developer Options.
3. Make a backup of all your important data before following the guide.
4. The Galaxy Note 3 should be factory unlocked and not locked to any particular carrier.
5. Ensure the battery of the phone is charged more than 80 percent.
6. The Android 4.3 XXUCMJ7 Jelly Bean firmware is compatible only with Samsung Galaxy Note 3 with model number SM-N900. Applying this to any incorrect variant might brick the device. Verify the model number of the Galaxy Note 3 by navigating to Settings >> About Phone.

Files Required
1. Android 4.3 XXUCMJ7 Jelly Bean Firmware (Mirror Link) for Galaxy Note 3 N900
2. Odin 3.07 (Mirror Link)

Steps to Update Galaxy Note 3 N900 with Android 4.3 XXUCMJ7 Jelly Bean Firmware
Step 1: Extract Firmware zip file using WinRAR/7-Zip/WinZip or any other extracting tool, you will get a .tar.md5 file and some other files (optional).
Step 2: Extract Odin zip file and you will get Odin3 v3.07.exe along with few other files.
Step 3: Switch off the Galaxy Note 3.
Step 4: Boot the device into Download Mode by pressing and holding Volume Down, Home and Power buttons together until a construction Android robot icon with a warning triangle appears on screen. Now press the Volume Up button to enter Download Mode.
Step 5: Run Odin on the computer as an Administrator.
Step 6: Connect the Galaxy Note 3 to the computer using USB cable while it is in the Download Mode. Wait until Odin detects the device. When the device is connected successfully, the ID: COM box will turn to light blue with the COM port number. Additionally, the successful connected will be indicated by a message saying Added.

Note: If the Added message does not appear, then try re-install USB drivers or changing the port on the computer.

Step 7: Select the following files in Odin from extracted N900XXUCMJ7 firmware folder:
  • Click the PDA button and select the .tar.md5 file.
  • Click the Phone button and select file with MODEM in its name. Ignore if there is no such file.
  • Click the CSC button and select file with CSC in its name. Ignore if there is no such file.
  • Click the PIT button and select the .pit file. Ignore if there is no such file.
Step 8: In Odin, enable Auto Reboot and F. Reset Time checkboxes. Also, ensure the Re-Partition checkbox is chosen only if a .pit file was chosen in the previous step.
Step 9: Verify everything suggested in Step 7 and Step 8 is done correctly. Then hit the Start button to begin the installation process.
Step 10: Once the installation process is completed, your phone will restart and soon you will see a PASS message with green background in the left-most box at the very top of the Odin. You can now unplug the USB cable to disconnect it from the computer.

Samsung Galaxy Note 3 N900 should be now updated with official Android 4.3 XXUCMJ7 Jelly Bean. Head over to Settings >> About Phone to verify the software version running on the device.

Note: If Galaxy Note 3 N900 stuck at booting animation after Step 10 then go to recovery mode (press and hold the Volume Up and Power buttons together) and perform Wipe data/Factory Reset and Wipe Cache Partition task before selecting reboot system now function. In recovery mode use Volume keys to navigate between options and Power key to select the option. Please note, performing wiping task will erase your device internal memory data and not external SD card data.
Read More..

WinASO Registry Optimizer 4 8 5 Incl Patch

Get itt Free WinASO Registry Optimizer 4.7.7 Full License + Cracked Key - advanced registry optimizer & cleaner allowing you to safely clean & repair registry problems with just a few simple clicks. fix common problems such as denied access to missing drives and disks
Download WinASO Registry Optimizer 4.8.5
Download here WinASO Registry Optimizer 4.7.7 Full Version
Its advanced scanning algorithm can scan the entire registry within a few seconds for obsolete & invalid entries, all listed comprehensively in the scanning report, as well as other registry errors.
Read More..

How to Update Galaxy S4 I9500 with Android 4 2 2 XXUBMF8 Jelly Bean Official Firmware

Southeast Asian owners of Samsung Galaxy S4 Exynos variant (GT-I9500) have received a new software update based on Android 4.2.2 Jelly Bean with firmware build number I9500XXUBMF8. The new official firmware is currently hitting Vietnam and Thailand as an Over-The-Air (OTA) update as well as through Samsung KIES.

Firmware details
PDA: I9500XXUBMF8
CSC: I9500OLBBMF8
MODEM: I9500DXUBMF8
Version: Android 4.2.2
Built date: Jun 19, 2013
Regions: Indonesia, Malaysia, Philippines, Singapore, Vietnam, Thailand

Samsung Galaxy S4 I9500 users who missed the OTA update notification or unable to access the update over Samsung KIES, may follow our step-by-step guide to install the update manually.

Pre-requisites
1. Install USB Driver for Samsung Galaxy S4 on the computer.
2. Enable USB Debugging Mode on the phone by navigating to Settings >> Developer Options.
3. Make a backup of all your important data before following the guide.
4. The Galaxy S4 should be factory unlocked and not locked to any particular carrier.
5. Ensure the battery of the phone is charged more than 80 per cent.
6. The Android 4.2.2 XXUBMF8 Jelly Bean firmware is compatible only with Samsung Galaxy S4 I9500. Applying this to any incorrect variant might brick the device. Verify the model number of the Galaxy S4 by navigating to Settings >> About Phone.

Files Required
1. Android 4.2.2 XXUBMF8 Jelly Bean Firmware for Samsung Galaxy S4 I9500
2. Odin 3.07 (Mirror Link)

Steps to Update Galaxy S4 I9500 with Android 4.2.2 XXUBMF8 Jelly Bean Firmware
Step 1: Extract Firmware zip file using WinRAR/7-Zip/WinZip or any other extracting tool, you will get a .tar.md5 file and some other files (optional).
Step 2: Extract Odin zip file and you will get Odin3 v3.07.exe along with few other files.
Step 3: Power off your phone. Wait 5-6 seconds for vibration to confirm complete switch off.
Step 4: Boot the device into Download Mode by pressing and holding Volume Down + Home buttons together and then press the Power button until the device turns on. Now press the Volume Up button to enter Download Mode.
Step 5: Run Odin on the computer as an Administrator.
Step 6: Connect the Galaxy S4 to the computer using USB cable while it is in the Download Mode. Wait until Odin detects the device. When the device is connected successfully, the ID: COM box will turn blue with the COM port number. Additionally, the successful connected will be indicated by a message saying Added.
Step 7: Choose the following files in Odin from extracted I9505XXUBMF8 firmware folder by using respective checkboxes:
  • Select the PDA checkbox, and choose the file named .tar or .md5.
  • Click the Phone checkbox, and choose the file with modem in its name (ignore if there is no such file)
  • Click the CSC checkbox, and select the file with csc in its name (ignore if such file is missing)
  • Choose the PIT checkbox, and choose the .pit file. Use only the file obtained during extracting in step 1 above, otherwise ignore it.
Step 8: In Odin, enable Auto Reboot and F. Reset Time checkboxes. Also, ensure the Re-Partition checkbox is chosen only if a .pit file was chosen in the previous step.
Step 9: Verify everything suggested in Step 7 and Step 8 is done correctly. Then hit the START button to begin the installation process.
Step 10: Once the installation process is completed, your phone will restart and soon you will see a PASS message with green background in the left-most box at the very top of the Odin. You can now unplug the USB cable to disconnect your device from computer.

Samsung Galaxy S4 I9500 should be now updated with official Android 4.2.2 XXUBMF8 Jelly Bean. Head over to Settings >> About Phone to verify the software version running on the device.

Note: If Galaxy S4 I9500 stuck at booting animation after Step 10 then go to recovery mode (press and hold the Volume Up, Home and Power buttons together) and perform Wipe data/Factory Reset and Wipe Cache Partition task before selecting reboot system now function. In recovery mode use Volume keys to navigate between options and Power key to select the option. Please note, performing wiping task will erase your device internal memory data and not external SD card data.
Read More..

How to Update Galaxy Mega 5 8 I9152 with Android 4 2 2 XWUAML3 Jelly Bean Official Firmware

Samsung has recently released another Android 4.2.2 Jelly Bean update with base firmware I9152XWUAML3 for Galaxy Mega 5.8 with Dual SIM card slot (GT-I9152). The new official firmware is now available as an Over-The-Air (OTA) update in Southeast Asian countries.

Firmware details
PDA: I9152XWUAML3
CSC: I9152OLBAML1
MODEM: I9152XXUAML4
Version: Android 4.2.2
Built date: Dec 23, 2013
Regions: Indonesia, Malaysia, Philippines, Singapore, Vietnam, Thailand

Samsung Galaxy Mega 5.8 I9152 users who missed the OTA update notification or unable to access the update over Samsung KIES, may follow our step-by-step guide to install the update manually.

Pre-requisites
1. Install USB Drivers for Samsung Galaxy Mega 5.8 on the computer.
2. Enable USB Debugging Mode on the phone by navigating to Settings >> Developer Options.
3. Make a backup of all your important data before following the guide.
4. The Galaxy Mega 5.8 should be factory unlocked and not locked to any particular carrier.
5. Ensure the battery of the phone is charged more than 80 percent.
6. The Android 4.2.2 XWUAML3 Jelly Bean firmware is compatible only with the Samsung Galaxy Mega 5.8 (GT-I9152). Applying this to any incorrect variant might brick the device. Verify the model number of the Galaxy Mega 5.8 by navigating to Settings >> About Phone.

Files Required
1. Android 4.2.2 XWUAML3 Jelly Bean Firmware (Mirror Link 1, Link 2)
2. Odin 3.07 (Mirror Link)

Steps to Update Galaxy Mega 5.8 I9152 with Android 4.2.2 XWUAML3 Jelly Bean Firmware
Step 1: Extract Firmware zip file using WinRAR/7-Zip/WinZip or any other extracting tool, you will get a .tar.md5 file and some other files (optional).
Step 2: Extract Odin zip file and you will get Odin3 v3.07.exe along with few other files.
Step 3: Switch off the Galaxy Mega 5.8.
Step 4: Boot the device into Download Mode by pressing and holding Volume Down, Home and Power buttons together until a construction Android robot icon with a warning triangle appears on screen. Now press the Volume Up button to enter Download Mode.
Step 5: Run Odin on the computer as an Administrator.
Step 6: Connect the Galaxy Mega 5.8 to the computer using USB cable while it is in the Download Mode. Wait until Odin detects the device. When the device is connected successfully, the ID: COM box will turn to light blue with the COM port number. Additionally, the successful connected will be indicated by a message saying Added.

Note: If the Added message does not appear, then try re-install USB drivers or changing the port on the computer.

Step 7: Select the following files in Odin from extracted I9152XWUAML3 firmware folder:
  • Click the PDA button and select the .tar.md5 file.
  • Click the Phone button and select file with MODEM in its name. Ignore if there is no such file.
  • Click the CSC button and select file with CSC in its name. Ignore if there is no such file.
  • Click the PIT button and select the .pit file. Ignore if there is no such file.
Step 8: In Odin, enable Auto Reboot and F. Reset Time checkboxes. Also, ensure the Re-Partition checkbox is chosen only if a .pit file was chosen in the previous step.
Step 9: Verify everything suggested in Step 7 and Step 8 is done correctly. Then hit the Start button to begin the installation process.
Step 10: Once the installation process completes, your phone will restart and soon you will see a PASS message with green background in the left-most box at the very top of the Odin. You can now unplug the USB cable to disconnect your device from the computer.

Samsung Galaxy Mega 5.8 I9152 should be now updated with official Android 4.2.2 XWUAML3 Jelly Bean. Head over to Settings >> About Phone to verify the software version running on the device.

Note: If Galaxy Mega 5.8 I9152 stuck at booting animation after Step 10 then go to recovery mode (press and hold the Volume Up, Home and Power buttons together) and perform Wipe data/Factory Reset and Wipe Cache Partition task before selecting reboot system now function. In recovery mode use Volume keys to navigate between options and Power key to select the option. Please note, performing wiping task will erase your device internal memory data and not external SD card data.
Read More..

List Lengkap Update Resmi Android 4 0 ICS Samsung

Beberapa fans Samsung mungkin sudah tidak sabar dengan even launching Samsung Galaxy S3 pada 3 Mei mendatang. Akan tetapi para pengguna ponsel Samsung yang belum berencana untuk melakukan upgrade tentunya masih menunggu kejelasan jadwal update Android 4.0 bagi ponsel mereka.
Berikut list resmi update Samsung berdasarkan situs Androidandme.
Berita terakhir dari Samsung untuk update Android 4.0

  • 4/16/12 - Samsung Galaxy Note Premium Suite diperkenalkan dalam sebuah video (termasuk update Android 4.0)
  • 4/15/12 - Android 4.0 tersedia untuk Nexus S 4G (sprint)
  • 3/5/12   - Galaxy S2 mendapat update Android 4.0

Device Samsung yang sudah menggunakan Android 4.0

  • Samsung Galaxy Nexus (Global/LTE)
  • Samsung Galaxy Tab 2 (belum dirilis)
  • Samsung Galaxy S2 (Global)
  • Samsung Nexus S (Global/AT&T/T-Mobile/Sprint)

Device Samsung yang resmi dikabarkan mendapat update Android 4.0

  • Samsung Galaxy Note (Global)
  • Samsung Galaxy Note (AT&T)
  • Samsung Galaxy S2 (AT&T)
  • Samsung Galaxy S2 Epic 4G Touch
  • Samsung Galaxy S2 Skyrocket
  • Samsung Captive Glide
  • Samsung Galaxy Tab 8.9 (AT&T)
  • Samsung Galaxy Tab 10.1 (Verizon)
  • Samsung Galaxy Tab 7.7 (Verizon)
  • Samsung Galaxy Tab 7.0 Plus Wi-Fi
  • Samsung Galaxy Tab 8.9 Wi-Fi
  • Samsung Galaxy Tab 10.1 Wi-Fi

Device Samsung yang kemungkinan akan mendapat update Android 4.0

  • Samsung Galaxy S2 (T-Mobile)
  • Samsung Galaxy S2 Skyrocket HD
  • Samsung Galaxy Blaze 4G

Device Samsung yang kemungkinan tidak akan mendapat update Android 4.0

  • Samsung Galaxy S
  • Samsung Galaxy S Captivate
  • Samsung Galaxy S Fascinate
  • Samsung Galaxy S Vibrant
  • Samsung Galaxy Tab 7
  • Samsung Galaxy R
  • Samsung Exhibit 2 4G
  • Samsung Gravity Smart
  • Samsung Dart
Read More..

How to Root Galaxy S4 I9505 Snapdragon on Android 4 2 2 Jelly Bean Firmware

Samsung Galaxy S4 I9505 (Snapdragon) users who have already updated their devices with Android 4.2.2 Jelly Bean, may root their devices using the tutorial below.

This tutorial uses CF-Auto-Root file released by recognised XDA Developers, Chainfire. The CF-Auto-Root file allowing Galaxy S4 I9505 users to root their devices easily without depending on the firmware. It completely supports Android 4.2.2 Jelly Bean and future firmware as well.

Disclaimer: Rooting voids the warranty of your device. We and the developer of this rooting procedures shall not be held responsible if any undesirable outcomes may happen to your device. use of this root guide is solely at your own risk!

Pre-requisites
1) Install USB Driver for Samsung Galaxy S4 I9505 on the computer.
2) Enable USB Debugging Mode on the phone.
3) Make a backup of all your important data before following the guide.
4) The Galaxy S4 I9505 should be factory unlocked and not locked to any particular carrier.
5) Ensure the battery of the phone is charged more than 80 per cent.
6) The CF-Auto-Root file works only on Samsung Galaxy S4 I9505 (Snapdragon). Applying this on any incorrect variant will brick the device. Verify the model number of the Galaxy S4 by navigating to Settings >> About Phone.

File Required
1. CF-Auto-Root for Galaxy S4 I9505 (CF-Auto-Root-jflte-jfltexx-gti9505.zip)
2. Odin 3.07

Steps to Root Galaxy S4 I9505 Running on Android 4.2.2 Jelly Bean Firmware
Step 1: Extract CF-Auto-Root and Odin 3.07 files using winrar/7zip/winzip or any other extracting tool.
Step 2: Switch off the Galaxy S4 I9505. Then boot the device into Download Mode by pressing and holding Volume Down + Home buttons together and then press the Power button until the device turns on. Now press the Volume Up button to enter Download Mode.
Step 3: Launch Odin on the computer.
Step 4: Connect the Galaxy S4 I9505 to the computer using USB cable while it is in the Download Mode. Wait until Odin detects the device. When the device is connected successfully, the ID: COM box will turn yellow with the COM port number. Additionally, the successful connected will be indicated by a message saying Added. If Odin fails to detect the device then re-install USB driver
Step 5: In Odin, click the PDA button and select the CF-Auto-Root-jflte-jfltexx-gti9505.tar.md5 file.
Step 6: Verify that Auto Reboot and F.Reset Time checkboxes are selected in Odin. Also, ensure the Re-Partition option in Odin is not selected.
Step 7: Double-check and click Start in Odin. The installation process will now begin.
Step 8: Once flashing completed, your phone will restart and soon you will see a PASS message with green background in the left-most box at the very top of the Odin. You can now unplug the USB cable to disconnect your device from computer.

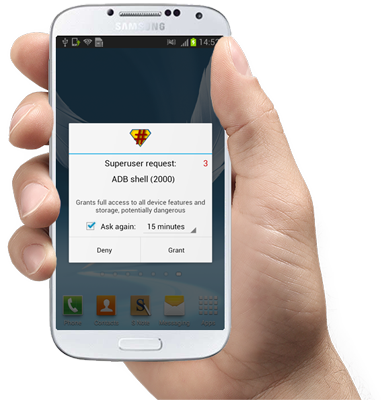
Samsung Galaxy S4 I9505 (Snapdragon) running on Android 4.2.2 Jelly Bean firmware is now rooted successfully. You may now install any app that requires root permission.

Thanks to all fellas at XDA who first tried out this rooting technique. This method was originally posted via XDA-Developers original thread.
Read More..

How to Update Galaxy Note 2 U S Cellular SCH R950 with Android 4 3 VXUBMK3 Jelly Bean Official Firmware

U.S. Cellular has started rolling out the Android 4.3 Jelly Bean update to its variant of the Galaxy Note 2 (SCH-R950). The new official firmware is now available as an Over-The-Air (OTA) update as well as through Samsung KIES.

Firmware details
PDA: R950VXUBMK3
CSC: R950USCBMK3
MODEM: R950VXUBMK3
Version: Android 4.3
Build date: Nov 11, 2013
Regions: U.S. (U.S. Cellular)

Samsung Galaxy Note 2 (U.S. Cellular) SCH-R950 users who missed the OTA update notification or unable to access the update over Samsung KIES, may follow our step-by-step guide to install the update manually.

Pre-requisites
1. Install USB Drivers for Samsung Galaxy Note 2 on the computer.
2. Enable USB Debugging Mode on the phone by navigating to Settings >> Developer Options.
3. Make a backup of all your important data before following the guide.
4. Ensure the battery of the phone is charged more than 80 percent.
5. The Android 4.3 VXUBMK3 Jelly Bean firmware is compatible only with the U.S. Cellular version of Galaxy Note 2 (SCH-R950). Applying this to any incorrect variant might brick the device. Verify the model number of the Galaxy Note 2 by navigating to Settings >> About Phone.

Files Required
1. Android 4.3 VXUBMK3 Jelly Bean Firmware (Mirror Link)
2. Odin 3.07

Steps to Update Galaxy Note 2 (U.S. Cellular) SCH-R950 with Android 4.3 VXUBMK3 Jelly Bean Firmware
Step 1: Extract Firmware zip file using WinRAR/7-Zip/WinZip or any other extracting tool, you will get a .tar.md5 file and some other files (optional).
Step 2: Extract Odin zip file and you will get Odin3 v3.07.exe along with few other files.
Step 3: Switch off the Galaxy Note 2.
Step 4: Boot the device into Download Mode by pressing and holding Volume Down and Power buttons together until a construction Android robot icon with a warning triangle appears on screen. Now press the Volume Up button to enter Download Mode.
Step 5: Run Odin on the computer as an Administrator.
Step 6: Connect the Galaxy Note 2 to the computer using USB cable while it is in the Download Mode. Wait until Odin detects the device. When the device is connected successfully, the ID: COM box will turn to light blue with the COM port number. Additionally, the successful connected will be indicated by a message saying Added.

Note: If the Added message does not appear, then try re-install USB drivers or changing the port on the computer.

Step 7: Select the following files in Odin from extracted R950VXUBMK3 firmware folder:
  • Click the PDA button and select the .tar.md5 file.
  • Click the Phone button and select file with MODEM in its name. Ignore if there is no such file.
  • Click the CSC button and select file with CSC in its name. Ignore if there is no such file.
  • Click the PIT button and select the .pit file. Ignore if there is no such file.
Step 8: In Odin, enable Auto Reboot and F. Reset Time checkboxes. Also, ensure the Re-Partition checkbox is chosen only if a .pit file was chosen in the previous step.
Step 9: Verify everything suggested in Step 7 and Step 8 is done correctly. Then hit the Start button to begin the installation process.
Step 10: Once the installation process is completed, your phone will restart and soon you will see a PASS message with green background in the left-most box at the very top of the Odin. You can now unplug the USB cable to disconnect it from the computer.

Samsung Galaxy Note 2 (U.S. Cellular) SCH-R950 should be now updated with the Android 4.3 VXUBMK3 Jelly Bean official firmware. Head over to Settings >> About Phone to verify the software version running on the device.

Note: If Galaxy Note 2 (U.S. Cellular) SCH-R950 stuck at booting animation after Step 10 then go to recovery mode (press and hold the Volume Up and Power buttons together) and perform Wipe data/Factory Reset and Wipe Cache Partition task before selecting reboot system now function. In recovery mode use Volume keys to navigate between options and Power key to select the option. Please note, performing wiping task will erase your device internal memory data and not external SD card data.
Read More..

How to Root Galaxy Note 8 0 LTE N5120 on Android 4 2 2 XXCMH1 Jelly Bean Firmware

Samsung has just started to push Android 4.2.2 Jelly Bean update with firmware build numbers N5120XXCMH1 to the LTE version of Galaxy Note 8.0 (GT-N5120).

Samsung Galaxy Note 8.0 (LTE) N5120 users who have already updated their devices with Android 4.2.2 XXCMH1 Jelly Bean, may root their devices using the tutorial below.

This tutorial uses CF-Auto-Root file released by recognised XDA Developers, Chainfire. The CF-Auto-Root file allowing Galaxy Note 8.0 users to root their devices easily without depending on the firmware. It completely supports Android 4.2.2 Jelly Bean and future firmware as well. Head over to the CF-Auto-Root main thread to learn more about the root method.

Disclaimer: Rooting voids the warranty of your device. We and the developer of this rooting procedures shall not be held responsible if any undesirable outcomes may happen to your device. use of this root guide is solely at your own risk!

Pre-requisites
1. Install USB Drivers for Samsung Galaxy Note 8.0 on the computer.
2. Enable USB Debugging Mode on the phone by navigating to Settings >> Developer Options.
3. Make a backup of all your important data before following the guide.
4. The Galaxy Note 8.0 should be factory unlocked and not locked to any particular carrier.
5. Ensure the battery of the phone is charged more than 80 percent.
6. The CF-Auto-Root file works only on Samsung Galaxy Note 8.0 (LTE) N5120. Applying this to any incorrect variant might brick the device. Verify the model number of the Galaxy Note 8.0 by navigating to Settings >> About Phone.

Files Required
1. CF-Auto-Root for Galaxy Note 8.0 (LTE) N5120 (CF-Auto-Root-konalte-konaltexx-gtn5120.zip)
2. Odin 3.07 (Mirror Link)

Steps to Root Galaxy Note 8.0 (LTE) N5120 Running on Android 4.2.2 XXCMH1 Jelly Bean Firmware
Step 1: Extract CF-Auto-Root and Odin 3.07 files using WinRAR/7-Zip/WinZip or any other extracting tool.
Step 2: Switch off the Galaxy Note 8.0. Then boot the device into Download Mode by pressing and holding Volume DownHome and Power buttons together until a construction Android robot icon with a warning triangle appears on screen. Now press the Volume Up button to enter Download Mode.
Step 3: Launch Odin on the computer as an Administrator.
Step 4: Connect the Galaxy Note 8.0 to the computer using USB cable while it is in the Download Mode. Wait until Odin detects the device. When the device is connected successfully, the ID: COM box will turn blue with the COM port number. Additionally, the successful connected will be indicated by a message saying Added.

Note: If the Added message does not appear, then try re-install USB drivers or changing the port on the computer.

Step 5: In Odin, click the PDA button and select the CF-Auto-Root-konalte-konaltexx-gtn5120.tar.md5 file.
Step 6: Verify that Auto Reboot and F.Reset Time checkboxes are selected in Odin. Also, ensure the Re-Partition option is not selected.
Step 7: Double-check and click Start button in Odin. The installation process will now begin.
Step 8: Once the installation process is completed, your phone will restart and soon you will see a PASS message with green background in the left-most box at the very top of the Odin. You can now unplug the USB cable to disconnect your device from computer.

Samsung Galaxy Note 8.0 (LTE) N5120 running on Android 4.2.2 XXCMH1 firmware is now rooted successfully. You can now install any app that requires root permission. Verify the root status of the device by downloading Root Checker app from Google Play Store.

Thanks to all fellas at XDA who first tried out this rooting technique. This method was originally posted via XDA-Developers original thread.
Read More..

T3 Presents The Android Guide Vol 4 2012

T3 Presents The Android Guide Vol 4 2012

Type : pdf
Size : 62 MB
Artis :
Android Pack 2012
Rating :


Search Result


T3 Presents: The Android Guide - Vol.4, 2012 - pdf magazine
[ mediafire] T3 Presents: The Android Guide - Vol.4, 2012 - English | 84 pages | HQ PDF | 62.00 Mb is the worlds number one gadget magazine. Each issue is packed ...

T3 Presents: The Android Guide - Vol.4 2012 Free Download - Dltobe.Com
T3 Presents: The Android Guide - Vol.4, 2012 English | 84 pages | HQ PDF | 62.00 Mb T3 is the worlds number one gadget magazine. Each issue is packed full of the ...

T3 Presents: The Android Guide - Vol.4, 2012 » Download FREE ...
T3 Presents: The Android Guide - Vol.4, 2012 English | 84 pages | HQ PDF | 62.00 Mb T3 is the worlds number one gadget magazine. Each issue is packed full of the ...

T3 Presents: The Android Guide - Vol.3, 2012 (HQ PDF) » Download ...
T3 is the world s number one gadget magazine. Each issue is packed full of the latest tech news and analysis, gadget reviews, intelligent features and a buying guide.

T3 Presents: The Android Guide - Vol.4, 2012 (HQ PDF) » Download ...
T3 Presents: The Android Guide - Vol.4, 2012 (HQ PDF)Android English | 84 pages | HQ PDF | 62.00 Mb T3 is the worldâÂÂs number one gadget magazine. Each ...

T3 Presents - The Android Guide - Vol.4, 2012 » Download FREE ...
T3 Presents - The Android Guide - Vol.4, 2012 English | 84 pages | HQ PDF | 62.00 Mb T3 Presents - The Android Guide - Vol.4, 2012 English | 84 pages | HQ PDF | 62.00 ...

T3 Presents: The Android Guide - Vol.4, 2012 - Free eBooks Download
Download Free eBook:T3 Presents: The Android Guide - Vol.4, 2012 - Free chm, pdf ebooks download

Download T3 Presents The Android Guide Vol 4 2012 [Mediafire ...
T3 Presents: The Android Guide Vol 4 2012 T3 Presents: The Android Guide Vol 4 2012 English | 84 pages | HQ PDF | 62 MB T3 is the worlds number one

T3 Presents: The Android Guide - Vol.4, 2012 - Free Magazine Download
T3 Presents: The Android Guide - Vol.4, 2012 English | 84 pages | HQ PDF | 62.00 mb T3 is the worlds numb er one gadget magazine. Each issue is packed full of the ...

T3 Presents: The Android Guide - Vol.4, 2012
T3 Presents: The Android Guide - Vol.4, 2012 English | HQ PDF | 84 pages | 62 MB


Description


T3 Presents: The Android Guide - Vol.4, 2012 English | HQ PDF | 84 pages | 62 MB,T3 Presents: The Android Guide - Vol.4, 2012 English | 84 pages | HQ PDF | 62.00 mb T3 is the worlds numb er one gadget magazine. Each issue is packed full of the ...,T3 Presents: The Android Guide Vol 4 2012 T3 Presents: The Android Guide Vol 4 2012 English | 84 pages | HQ PDF | 62 MB T3 is the worlds number one,Download Free eBook:T3 Presents: The Android Guide - Vol.4, 2012 - Free chm, pdf ebooks download,T3 Presents - The Android Guide - Vol.4, 2012 English | 84 pages | HQ PDF | 62.00 Mb T3 Presents - The Android Guide - Vol.4, 2012 English | 84 pages | HQ PDF | 62.00 ...,T3 Presents: The Android Guide - Vol.4, 2012 (HQ PDF)Android English | 84 pages | HQ PDF | 62.00 Mb T3 is the worldâÂÂs number one gadget magazine. Each ...,T3 is the world s number one gadget magazine. Each issue is packed full of the latest tech news and analysis, gadget reviews, intelligent features and a buying guide.,T3 Presents: The Android Guide - Vol.4, 2012 English | 84 pages | HQ PDF | 62.00 Mb T3 is the worlds number one gadget magazine. Each issue is packed full of the ...,T3 Presents: The Android Guide - Vol.4, 2012 English | 84 pages | HQ PDF | 62.00 Mb T3 is the worlds number one gadget magazine. Each issue is packed full of the ...,[ mediafire] T3 Presents: The Android Guide - Vol.4, 2012 - English | 84 pages | HQ PDF | 62.00 Mb is the worlds number one gadget magazine. Each issue is packed ...


Similar Post


  • mobileboy full v1 11 3 apk
  • 8tpBcbA 10 0 5 Android
  • Whatsapp ICSYorzua 274763 signed
  • StockMMS b randon14
  • beautiful widgets v3 75 apk
  • Game And AppZ Pack 29 AnDrOiD
  • Nq5R8Lm 1 3 0 Android
  • J2BpzJ 2 0 3 Android
  • NSWPM v1 51 softarchive net
  • p20


Read More..

Lucky Patcher 2 4 1 by ChelpuS Android

Lucky Patcher 2.4.1 by ChelpuS (Android) Remove License Verification

Overview: You can use this patcher to break some apps’ Android Market License Verification.

Requirements: Android 1.6, Rooted device.


nTNDU Lucky Patcher 2.4.1 by ChelpuS (Android)


What’s New in Lucky Patcher 2.4.1 :

~ Icons loading optimised;

~ Algoritm by Rebuild Apk Reworked;

~ Progressbar for downloading added;

~ Out of Memory Bug fixed.


Thanks to ChelpuS :thank you:


vaRK7 Lucky Patcher 2.4.1 by ChelpuS (Android)


Download Lucky Patcher 2.4.1 by ChelpuS (Android)


Requirements By Androidui.blogspot.com

http://ul.to/528yt46m/Lucky.Patcher.2.4.1.by.ChelpuS.Android.zip

http://filedefend.com/t844430a1jl8/Lucky.Patcher.2.4.1.by.ChelpuS.Android.zip


The post Lucky Patcher 2.4.1 by ChelpuS (Android) appeared first on Megandroids.

Read More..

Free Download Game SWAT 4 Full Version

Download Game SWAT 4 Full Version

 Download Game SWAT 4 PC Full Version
Download Game SWAT 4 PC Full Version, Free Download Game SWAT 4 PC Full Version, SWAT 4 PC Full Version DownloadDownload Game SWAT 4, SWAT 4 Full Download

Swat 4 is a game created by Irrational Games and published by Publisher: Vivendi Universal Games. SWAT series has reached to 4nya series, something that indicates that this is not just a series of games that appear and go away in the world of PC gaming. SWAT series is a series of close-quarter combat FPS berjeniskan based on realistic actions of the special police force in the United States. As the name implies SWAT really trying to show imitation of actions carried out by its members, ranging from criminals to raid places handling the bank robbery and hostage situation.
After you run the Swat 4, you will be faced with several choices of career, training, instant action, play a quick mission, quick mission maker, host games, join games, as well as setting and credits. For starters gamers should choose to practice beforehand, especially those who have never played the SWAT series, Including brilliant training given, it is sufficient to play this game without having to memorize, searching manually or look back on how to play them. Sound for Swat 4, very good, satisfactory weapon sound effects to be heard, then at the time of the briefing we will be Able to listen to the sound of the 911 reports and our instructors that sounds realistic. If you Fans of games suitable anti-terrorist games you play.
System Requirements:
  • Windows XP/Vista/7/8
  • Processor Pentium Iv,  3Ghz or Higher
  • RAM: minimum 1 GB
  • DirectX 9.0c or higher
  • 3 Gb Free HD Space
  • 128 bit 128 Mb Ram VGA
Screenshoot
 Download Game SWAT 4 PC Full Version
 Download Game SWAT 4 PC Full Version
 Download Game SWAT 4 PC Full Version

File Size: 1.62 GB / Pass rar: dloadgame.com
Firedrive | Full Version

Download Game SWAT 4 PC Now


Read More..

Blog Archive

Powered by Blogger.